
Clean install with bootable Windows 10 ISO
A guide on getting a clean install of Windows 10 with a fresh ISO from MSDN on an USB drive with extra meaty background information too.
Getting the latest Windows ISO from MSDN is a great way of being able to have an up-to-date installation of Windows with all the latest updates - or for that clean install when we need to Marie Kondo our OS! Plus unlike DVD installation media (do we still do this?) a bootable USB image is faster to install, easier to maintain and less hassles!
There are a few approaches and techniques for this, so this guide covers some important background info, the basic tools you’ll need and what to watchout for when creating a bootable image.
UEFI vs BIOS Booting
The first thing to consider is the age and type of machine you’re about to install Windows on via the bootable USB drive and the type of firmware that boots it.
Why is that important? Because choosing a UEFI boot option when your motherboard only supports BIOS will yield a message like this:
EFI PART
                Please remove this media and press any key to reboot
Let’s dig into the two different types first. You can also get Linus to explain BIOS vs UEFI or for a more technical overview, Florian from Advantech does a wonderful job.
BIOS - okay i’ll buy oss.
Short for Basic Input/Output System, the BIOS is what we’ve been used to since the mid-70s and presents that familiar blue background with yellow text. It’s architecture is quite dated now (16-bit) and is written purely in Assembler but for a user the main annoying point is the use of the MBR or Master Boot Record and never being designed for the wide variety of hardware we have now - including disks that are greater than 2TB.
The MBR was introduced by IBM for PC-DOS in ~1983 and it’s a special boot sector at the very start of your disk which contains a tiny program which loads the Volume Boot Record (VBR) of the partition which then bootstraps the operating system (chain loading) into RAM.
If you’ve ever wondered why Windows needs to ‘repair the MBR’ it’s usually because an update messing up or an attempt to dual boot has overwritten this tiny bit of code.
UEFI - you eee eff eye?
Most modern motherboards uses the UEFI (or Unified Extensible Firmware Interface) Specification to connect the hardware firmware to the operating system. It arrived for consumers in 2007 (though some of us Intel test folks got it on our Intel Engineering boards a little earlier thanks to it first being tried on the Itanium processors circa-2002) and Intel had plans to encourage the industry to move to UEFI completely by 2020 (omg that’s now!). Suffice to say, most motherboards released from 2015 and beyond, had UEFI support.
It’s also important to note that UEFI is actually a Firmware Specification, not an implementation of firmware (a lot of tech sites mix the two up).
There’s a whole host of functionality this brings with it including - but not limited to:
- Faster boot times by persisting information about the intialising process in a special partition called the EFI System Partition (ESP) which also contains the boot loader for the OS.
- Interactive UI with Mouse/Keyboard means you can get some really functional UIs with graphs, charts and the ability to configure fancy fan-curves.
- Supports Secure Boot which annoys most, but is important in corporate setting which blocks execution of non-verified OS code by verifying digital signatures of boot-loaders and stops when validation fails. For everyone else, it prohibits dual-booting say with Linux.
- Written in C whilst not really important for users, the firmware is written in C - which is far easier to write and maintain than the Assembly required for the BIOS. It can be either 32bit or 64bit too. Have a look at this timestamp in Florians video for the difference.
- Uses the GPT or GUID Partition Table instead of MBR (Master Boot Record) which is quite fragile - but it’s also an important difference as you’ll see when we create a bootable image, we need to pick one or the other.
- Large storage support & partition counts You can use storage volumes up to 9.x Zettabytes (MBR supports up to 2TB) and it supports having more than four partitions on each disk! You can read more about GPT Disks on Microsoft Docs
Create our bootable Windows 10 USB Drive via Rufus
Time to start baking our bootable USB, let’s download some things first to make it easy as pie.
!! NOTE
This article has had many revisions from RyanVM from Windows XP days, nLite for Windows 7 to UNetBootin guidance in the early 2010s. But as of 2017, the new tool of choice comes down to Rufus. Rufus also supportsinstall.wimlarger than 4GB.
- Rufus is an open-source portable application that lets you easily create bootable or live USB drives for both Windows and flavours of Linux. Grab the latest Rufus portable version, that’s all we need.
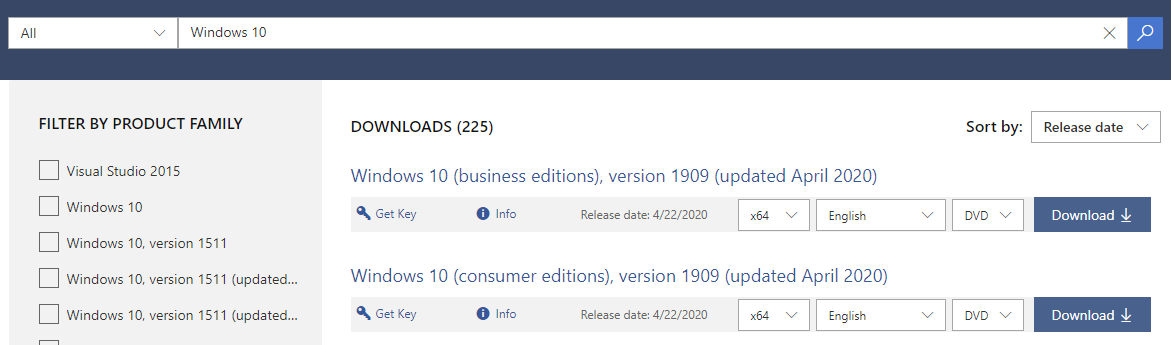
- Windows 10 ISO from the Microsoft, sort it by Release Date so you see the latest up the top.
Starting up Rufus will automatically select an available USB Storage device, make sure ‘Device’ it’s selected is indeed the one you want to use - keeping in mind it will delete all partitions and delete all data.
Then select the ISO you’ve downloaded (or customised via sysprep) and it will automatically select ‘Standard Windows installation’ as it’s image option. This loads a bunch of other settings to ensure you’re successful with the image.
But there’s one tiny thing you need to tell it, do you want an GPT (with some UEFI goodness)…

… or MBR (and hence BIOS) scheme.
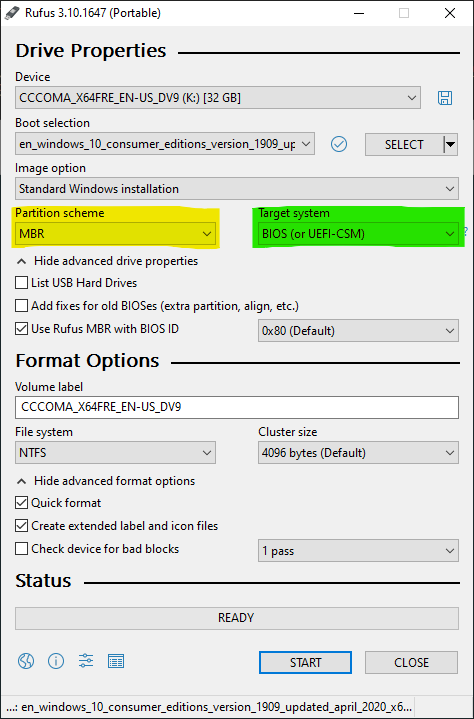
Once you pick the right scheme, hit that ‘START’ button and you’re good to go. If you pick the wrong one and get the message above, fear not, change the scheme and try again.
Create our bootable Windows 10 USB Drive via diskpart
The alternative method is to manually create the partitions on your USB disk using diskpart, install the bootsector and copy over the installation files - which was the original way to create bootable Windows images (we’ll forget the Windows USB/DVD Download Tool).
- Start a new elevated (Run As Administrator) instance of PowerShell or Command Prompt
- Execute the command
diskpartwhich will look like below:
PS C:\WINDOWS\system32> diskpart

Microsoft DiskPart version 10.0.18362.1

Copyright (C) Microsoft Corporation.
On computer: RYZEN-FTW

DISKPART>
- Next enter
list diskwhich will give you a listing of all your disks on your system.
DISKPART> list disk

  Disk ###  Status         Size     Free     Dyn  Gpt
  --------  -------------  -------  -------  ---  ---
  Disk 0    Online          xyz GB      0 B        *
  Disk 1    Online          abc GB      0 B
  Disk 2    Online         7632 MB      0 B

DISKPART>
- In my example list above, I know my USB drive is
Disk 2, find yours and replace the number 2 with the right number.
DISKPART> select disk 2

Disk 2 is now the selected disk.

DISKPART>
- Remove all partitions and volume information.
!! NOTE
This will delete all the files on this partition, ensure that the selected disk is indeed the right one.
DISKPART> clean
- Create the Primary Partition.
DISKPART> create partition primary
- Select the newly created partition
DISKPART> select partition 1
- Format it to FAT32
DISKPART> format quick fs=fat32
- Mark current partition as the active one
DISKPART> active
- We’re done, let’s exit.
DISKPART> exit
Leaving DiskPart...

PS C:\WINDOWS\system32>
- Now we need to mount our ISO (in Windows 10, just double click and it will mount it to a virtual drive) navigate to that virtual drive - my example it’s J drive.
PS C:\WINDOWS\system32> J:
- Go into the
\bootfolder in the mounted ISO and install the bootsector for the newly formatted drive - in my example, the USB drive is N.
PS J:\boot> bootsect.exe /nt60 N:
- Now let’s copy over the files from the ISO to your bootable USB drive with the bootsector configured.
PS J:\> robocopy j:\ n:\ /e
You can also use xcopy:
PS J:\> xcopy j:\*.* n:\ /e /h /f /-y
/ecopies subfolders including empty ones/htakes all hidden files and folders/fshows the files it’s copying in your output/-yoptional if you stop the xcopy, this confirms an overwrite
Take a deep breath, we’re done! Stick the USB into your PC and let it /boot whilst you grab some GRUB!