
PipeWire Loudness Normalisation
Setting up Loudness Normalisation / Equalisation for PipeWire when you're watching your favourite Youtube influencer!
One of the biggest features of Pop!_OS 22.04 LTS I’ve been waiting for is the native integration of PipeWire for audio processing. This brings a host of new low-latency graph based audio processing opportunities with sandboxing support (so you can run it from Flatpak).
This guide is a quick rundown on setting up Loudness Normalisation / Equalisation or Audio Normalisation for Linux (and in particular Pop!_OS but can by applied to any distro) which will help manage those annoying volume differences when you’re watching various content.
PipeWire Bling with EasyEffects
Install EasyEffects
Install EasyEffects which allows you to manipulate your PipeWire configuration easily and autoload on startup and save your configurations as profiles.
Once EasyEffects is installed, you can use the amazing EasyEffects Presets for Loudness Equalization from Guisy Digital by copying it to your output folder in EasyEffects.
Setup EasyEffect Preset
If you’ve installed EasyEffects via Flatpak as above, the path to the output folder is:
Otherwise, your path will be:
You can then grab the normalisation profile and place it into the output folder:
There’s also a fully automated way via my dotFiles repo, in particular just the setup-loudness-equalisation.sh script which detects the install path and pulls in the latest preset from the repository.
Configure PipeWire with EasyEffects
Next we have to configure EasyEffects to load the preset and do some configuration changes so the profile persists.
Enable EasyEffects on Startup
Hit the hamburger menu on the right and goto your Preferences.
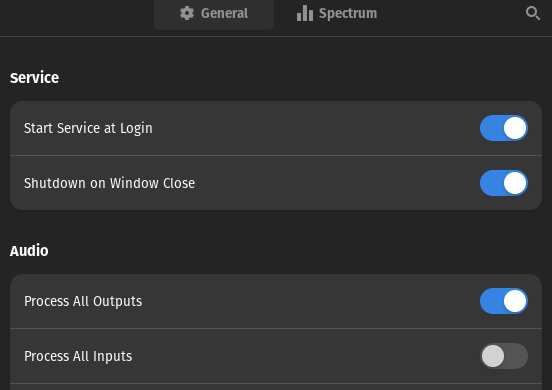
Then make sure that ‘Start Service at Login’ is enabled and close Preferences.
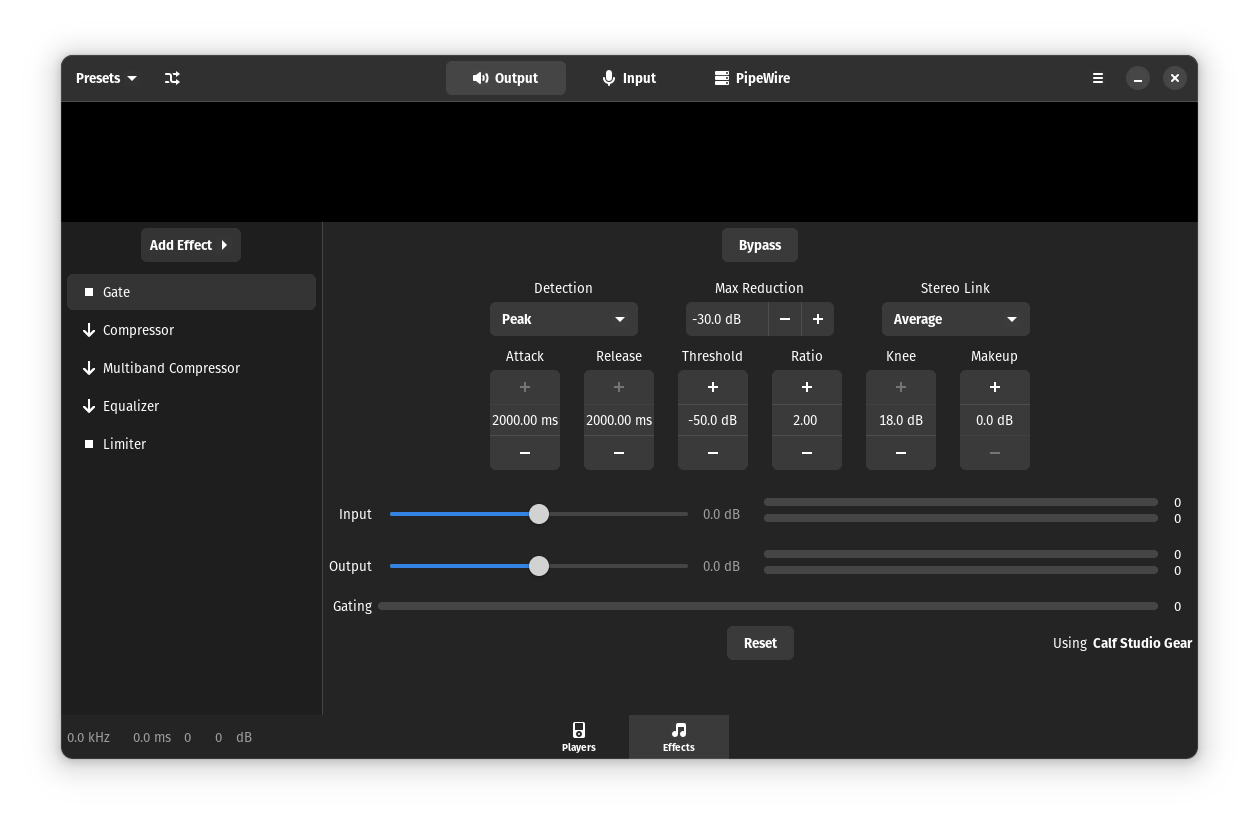
Load the Profile Preset
Next, in the ‘Output’ area, find the ‘Presets’ drop down on the left and select ‘Loudness Equalizer’ and hit Load. You can verify this was loaded correctly by going to the Effects tab at the bottom and you should get a list of Effects loaded like below:
Set Preset To Load at Startup
Next we want this preset to load at startup, head over to the PipeWire section and click ‘Presets Autoloading’ setting.
Here you’ll be presented with two drop downs, first is a list of your audio output devices and the other are your presets. Select the relevant audio device you want to wire up and make sure you select the ‘Loudness Equalizer’ profile to load with it, then hit the PLUS icon to add it to the list below.
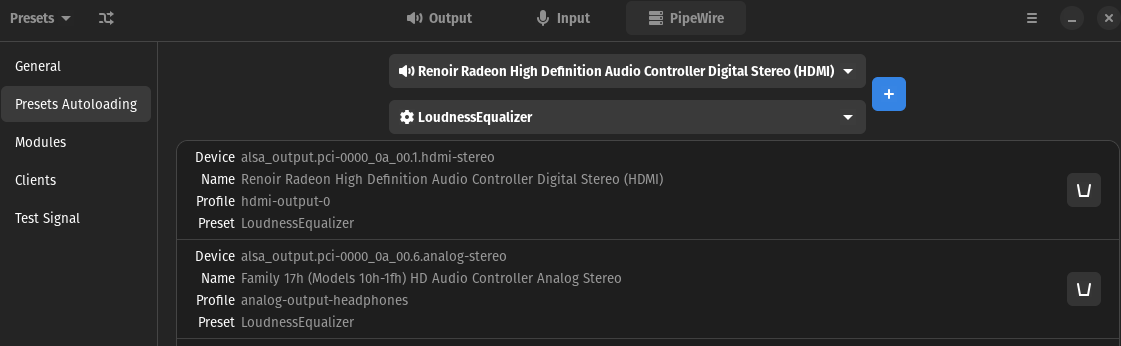
For my system, (with a Ryzen 5700G & the Dell U3421WE Monitor) I have only configured to normalise my main audio output and the audio via HDMI sent to my monitor.
And that’s it, you can give it ago with various audio content.
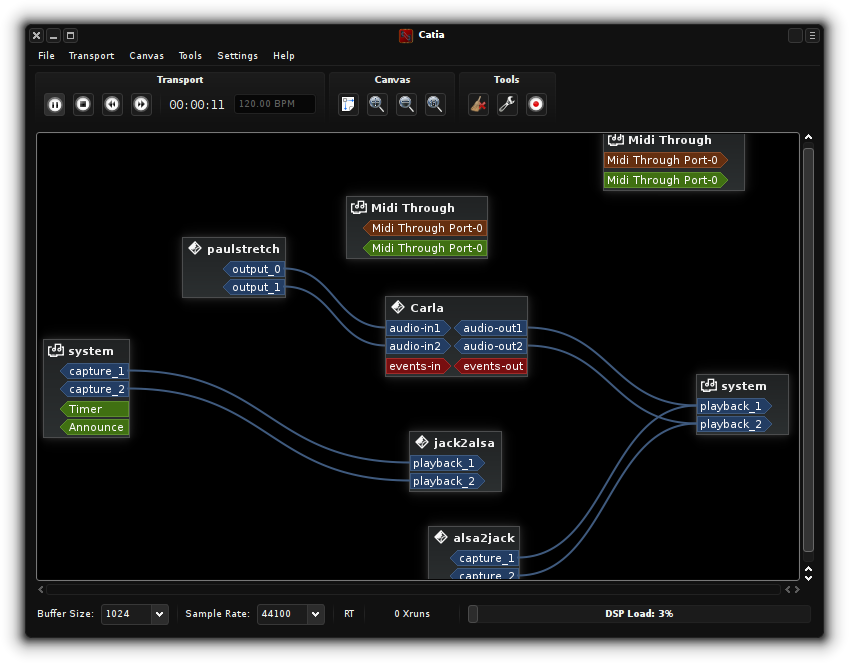
Installing Cadence & Catia
To take things a step further and see how your audio pipeline now works, you can install Cadence and Catia tools from KX Studio to visualise things.
First setup the repository as per KXStudio Repositories setup guide with the latest package file.
There are some awesome audio applications from KX Studios to check out too.