
Getting started with TinyGo for IoT Development
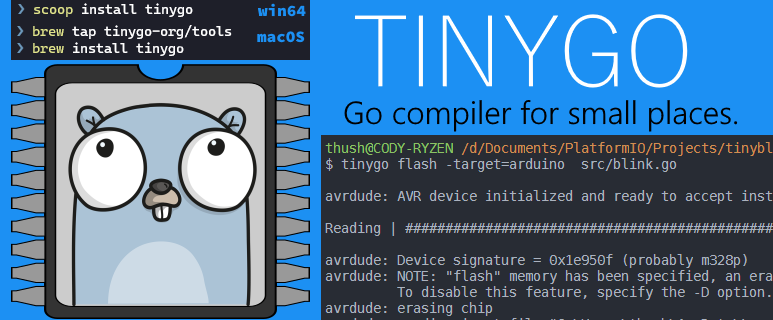
Explore using TinyGo for your IoT adventures on Arduino. Setting up - tooling, terminal goodies, VSCode with uploading your first sketch and some interesting bits about TinyGo in the new v0.15.x release.
What is TinyGo?
TinyGo is a new (ish) LLVM-based Compiler that supports a subset of the full Go Language and data-types, a hardware abstraction layer and it’s own runtime implementation (tiny’er than Go). Including a leaner number of Go Standard packages all geared towards IoT devices (and target architectures) that need a small footprint (both in binary size and memory utilisation).
As of the latest 0.15 release, TinyGo now includes support for the popular ESP32 & ESP8266 microcontrollers with more boards added frequently. What’s even cooler, is you can also muse about with the Nintendo Switch and Gameboy Advance - though they are still in early development. If that wasn’t enough, you can also build highly optimised Web Assembly builds too.
TinyGo’s support for hardware sensors and devices are also maturing with most of the popular devices supported.
The latest release also brings support for Bluetooth Low Energy (BLE) via the Nordic nRF51 & nRF52 SoCs too - like the Adafruit Feather nRF52 Kit.
There’s a mark-sweep garbage collector (on platforms outside of AVR) which is invoked when the heap is exhausted or when you force a GC Collection via runtime.GC(). One of the smart ways that TinyGo ensures your heap allocations are low is via escape analysis and where possible, optimise it out.
Go Routines are based on the async-await pattern synonymous with .NET’s async/await or Javascript’s async/await borrowing the C++ implementation used in CLang/LLVM via Coroutines in LLVM. An in-depth write up is available on Ayke van Laethem’s blog post on Goroutines in TinyGo with examples.
The TinyGo compiler pipeline relies heavily on the existing Golang Compiler pipeline and uses it for the parsing and type checking as well as the SSA construction but before this gets to the LLVM infrastructure, TinyGo has a go at optimising for both memory allocation and size constraints which is then further optimised by the LLVM optimiser and patched for the target architecture before the final binary is baked.

They’ve documented the TinyGo compiler internals, including how they implemented interrupts in TinyGo and the ways they’ve optimised heap allocation.
How Tiny are we talking?
Sometimes it’s worth taking a simple go example and seeing the compilation in Go (v1.15.2) vs TinyGo (v0.15). This was done on Linux (you can also use WSL2) as we can’t build Windows binaries for TinyGo yet.
Compiling with standard Go Compiler:
Now with TinyGo:
The size difference? Quite massive:
1.2M helloworld-go
21K  helloworld-tinygo
That’s some serious trimming and optimising, but hangon, what kind of hello world is that? You’re not even importing fmt?
OK let’s try a real token helloworld:
2.1M helloworld-go
253K helloworld-tinygo
Sure it’s a little less tiny but still a significantly bit leaner than the go binary.
Here’s a smattering of different versions and binary sizes for reference. The first example is Compact and the latter is Standard with Go 1.13 vs 1.15.2 and TinyGo 0.15 vs TinyGo 0.9.
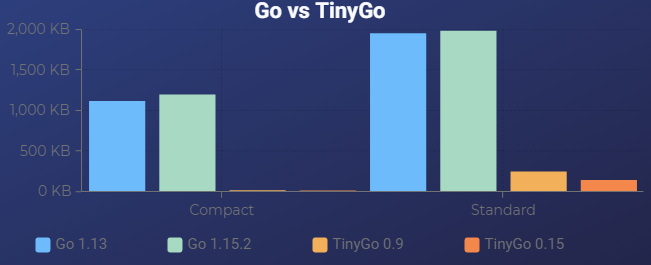
The raw data:
1.1M helloworld-compact-go-1.13
1.2M helloworld-compact-go-1.15.2
 21K helloworld-compact-tinygo-0.15
 20K helloworld-compact-tinygo-0.9
2.0M helloworld-standard-go-1.13
2.1M helloworld-standard-go-1.15.2
253K helloworld-standard-tinygo-0.15
149K helloworld-standard-tinygo-0.9
Note that the Go binaries are slowly increasing in size too.
Setting up TinyGo
Let’s take a look at how we get TinyGo setup so you can start writing in TinyGo for your tiny devices. Get the tooling setup, install some awesome goodies for your terminal, setup VSCode to make it a seamless experience and finally, upload a simple Blinky example to Arduino to test our setup.
For this example, I’ll be using an Arduino ATmega 328P based clone made by an Australian company named Freetronics called the Freeduino EtherTen.
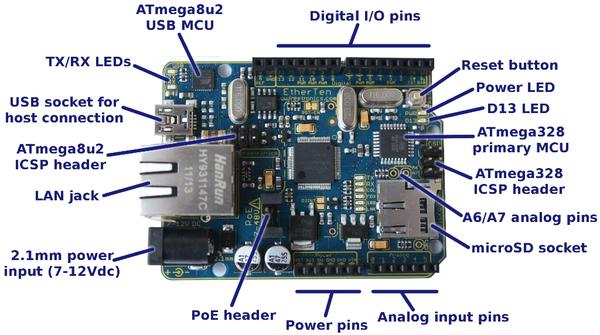
But if you have any Arduino clone or original or the many supported boards, you’ll be able to follow along!
We’re going to cover the Windows and macOS install but, you can also run TinyGo via Docker. However, you’ll have to flash your device on the host OS as you can’t do it within Docker itself.
Windows via scoop
Keep in mind that (currently) we can’t compile TinyGo binaries for Windows and it only supports MCU and WASM targets, but we can use TinyGo on Windows via Scoop.
The best thing about Scoop is that there’s no need for elevated privileges when installing software like Chocolatey needs.
You should already have installed Go v1.14+, if you haven’t, install that first:
Now let’s get TinyGo - the latest is v0.15.0 as of writing:
The package will update your $PATH to include the location of TinyGo too.
One extra thing we’ll do is to include the AVR-GCC toolchain for our Arduino board, that’s also in Scoop.
Verify TinyGo is installed correctly with a version and AVR-GCC Toolchain works with --version flag.
macOS via brew
Installing on macOS is trivial by using brew by adding the tinygo-org tap. Keep in mind you should have a modern version of Go v1.14+ installed already.
To setup the AVR-GCC toolchain, add the osx-cross tap and install:
Verify TinyGo is installed correctly with a version and AVR-GCC Toolchain works with --version flag.
Install drivers for TinyGo
Once TinyGo is installed, in order to query sensors and other hardware devices, we need to install the drivers.
Easily done via go get:
Full set of supported drivers are on the TinyGo Drivers Repo.
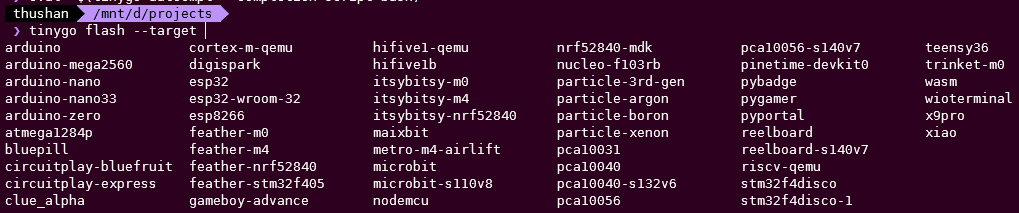
Setup tinygo-autocmpl for Terminals
The next step is to setup some terminal goodies for auto-completing TinyGo commands through the tinygo-autocmpl by Masaaki Takasago. This makes it super easy for resolving targets and switches for TinyGo on bash and zsh.
First go get it:
Then based on your shell, add the following to your ~/.bashrc profile:
For bash:
eval "$(tinygo-autocmpl --completion-script-bash)"
For zsh:
eval "$(tinygo-autocmpl --completion-script-zsh)"
Finally, reload it with:
source ~/.bashrc
Setup VSCode for TinyGo
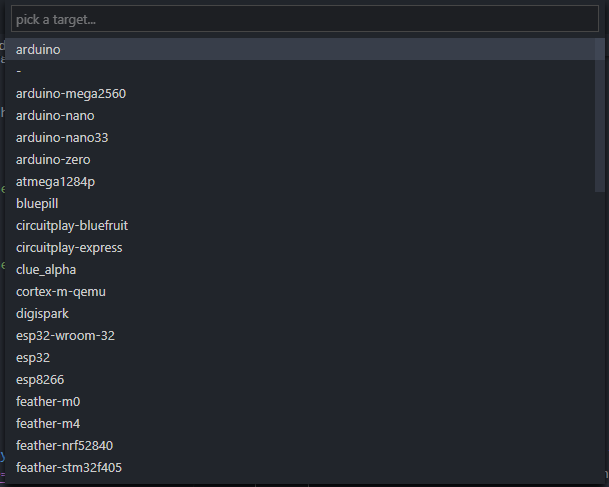
There’s a whole section on TinyGo IDE Integration, but if you’re using VSCode, get the TinyGo Extension which will update the Go Tool environment variables with the target of your choice too. Bring up the command palette and set the target microcontroller with TinyGo target.
In the next article, we’ll setup Jetbrains GoLand (which is what I use mostly now).
First Arduino Sketch - Blinky
Now that we’ve setup everything, let’s get cracking on our first sketch for our Arduino board. The simplest hello world, is that to blink the onboard LED with a delay heartbeat, affectionately we dub this blinky.go.
When you install TinyGo, you’ll find some examples in tinygo/src/examples.
Let’s get our Arduino’s onboard LED to blink for a second, then turn itself off and pulse 5 times.
To upload the above (let’s call that blink.go) we simply ask tinygo to flash to the target of arduino (or whichever device you have, the above is portable across a lot of boards).
Here’s my output on Windows - note that specifying the port is optional as of TinyGo 0.13+, but you can force specify the port with -port=/dev/[PORT].
Under the covers, TinyGo uses avrdude to flash the output of the machine code.
Your board should be blinking something like this:
Let’s dive deeper - Machine package
From the example below, let’s take a look at some of the important parts to it specific to TinyGo:
The machine package is the main backbone (the hardware abstraction layer) to all our interactions with the board or target, for the particular Arduino example above, it’s defined in the Arduino Machine API definition.
When we create a new supported board, we define the mapping of the pins to something meaningful, for example the default onboard LED pin is set to D13. This should be similar across a variety of boards which show board status.
Outside of the Pin Maps, it contains the processor frequency, bus setup and configuration for that specific board (or target).
In the main, we’re first going to configure our LED pin to be an output pin (keep in mind that GPIO pins can be either an input or output configuration), then we can instruct TinyGo to turn our configured led to be ON (led.High()) or OFF (led.Low()).
The boiler plate code around these fragments are standard Go code you already know and love - including the for loop and the time package used to delay/sleep.
Next time we’re going to dive into some GoRoutines and play with some sensors which is where the real interesting things happen and shows off some TinyGo prowness.
Play in the TinyGo Playground
A really neat little online learning tool is the TinyGo Playground where you can paste the above example and even play with GoRoutines in TinyGo like in tinygo\src\examples\blinky2 - try it with the Phytec reel board.
References
- GoLab 2019 - Small Is Going Big: Go on Microcontrollers excellent presentation from Ron Evans, that piqued my interest in TinyGo last year.
- Code size optimization for microcontrollers Ayke van Laethem’s post where he looks at how to tune
gccto emit small binaries - Interfaces in TinyGo really interesting look at how TinyGo implements the Go Interfaces & reducing memory allocations and code size.
- Goroutines in TinyGo how TinyGo uses the LLVM coroutines to implement goroutines.
- How the TinyGo Playground simulates hardware which explains how they managed to pull off the TinyGo Playground.
- Differences from Go to clarify how TinyGo compares.