
Proxmox: Mounting CIFS Shares in Containers
A quick guide on how to mount CIFS shares on Proxmox Containers for Proxmox 7.x release.
Mounting network/CIFS shares within a privileged (or unprivileged) Linux Container (LXC) can be quite tricky and an annoying experience within Proxmox due to the current way containers work as documented.
There is however a way around it for the time being by mounting it on the Proxmox Host and creating a mount-point within the Linux Container.
Configure the Proxmox Host
First step is to make sure that you can see the CIFS shares with the credentials you’ve got, server in this example is 192.168.0.12.
You’ll get a list of shares that are available for the server provided (using the credentials given).
It’s important to use the IP address above to avoid DNS Lookup delays, it’s very noticeable sometimes, though you can always use the DNS name here and update your /etc/hosts with the lookup too.
Next is to add the share to the Proxmox VE cluster as storage:
Here our server (Gandalf) is 192.168.0.12 the name of our share within Proxmox VE is neo-backups and you’re free to specify your authentication credentials.
You can optionally also specify the --path but by default it’s mounted in /mnt/pve/[StorageName]/ which in the example’s case is /mnt/pve/neo-backups.
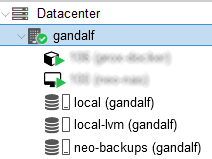
Once that’s complete, you’ll notice it appears in your Proxmox treeview, just under local-lvm.
We can verify it’s been mounted by checking our mounts and outputting the path with grep for the storage name we picked.
Lovely!
Configure the Proxmox Container
Now we need to associate our Container (CT) with the storage we just created via a mount point.
Let’s say that the container we want to expose this share is 104 (this is the Promox container’s ID from the treeview) and we want to mount the previous /mnt/pve/neo-backups to the containers /media/backups folder.
Ensure that container 104 is shutdown and…
It’s a silent update but you can check the configuration is updated by verifying the containers configuration file:
That’s all there is to it! Proxmox will maintain your storage in the backend with heartbeats and reconnect if you reboot your CIFS/Samba server too.
You can spin up your container and see if you can write to your new shared folder:
Not too shabby?