
Windows Terminal Setup
Simple guide to help you get started with Windows Terminal and work around some common problems, configure it to look schmick and improve your productivity too! Including my Windows Terminal profile with elevated terminal sessions in process!
Windows Terminal
The new terminal means we finally don’t need to install ConEmu (my favourite), Console2 or others to manage your terminal shells. For that we get a highly customisable, gpu-accelerated (text engine), tabbed interface and it’s open-source. Windows Terminal v1.0 was announced at Build 2020 on May 19th, 2020.
You will however require Windows 10 1903 (build 18362) or above. This guide focuses on the latest Windows Terminal v1.3 release (in preview as of writing).
We’re going to look at:
- How to configure and setup your Windows Terminal
- Customise the look and feel to your liking (themes, text, sizing) including some cool fonts to use!
- Include your most used shells, terminals and SSH endpoints.
- Configure the start-up so it launches your workspace ready to start!
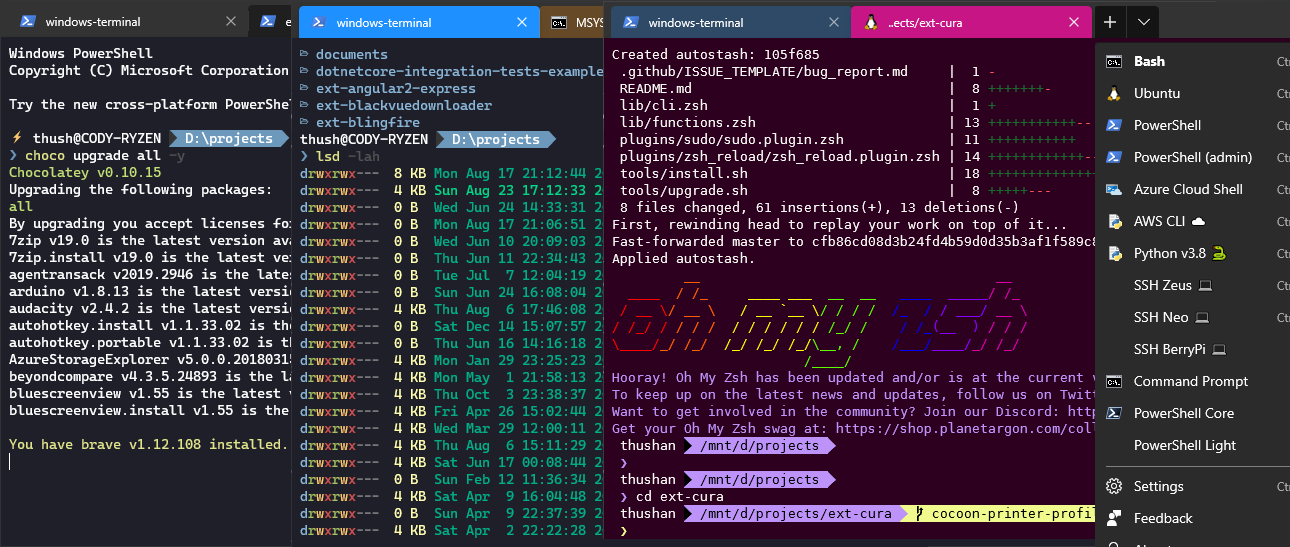
- Work around the need for elevation with a neat little trick like I have above (Powershell at the bottom is elevated!).
Github Gist:settings.json
My full settings.json at the bottom of the article, only relevant snippets are littered throughout the article.
Installing & Setting up
The easiest way is to install the latest release of Windows Terminal from the Microsoft Store. In the past, I’ve avoided the Microsoft Store (and generally most Windows Store apps on my desktop - going so far as to remove all it out of my installs!) but not anymore!
Alternatively, you can use a package manager like choco or the official package manager for Windows now, winget.
Once installed, when you launch Windows Terminal, you’ll notice it’s picked up a few default shells for you already (the down arrow next to the PLUS icon at the top), including the default Command Shell, PowerShell and WSL if you have it already installed.
Customising
Themes are called Schemas and it allows total customisability of the terminal via a settings.json file that’s automatically reloaded as you make changes. You can get to this file by the down arrow then Settings or, hit CTRL
,
. It will either open the file in Notepad or in Visual Studio Code if it’s installed.
Alternatively, you can find it at %LOCALAPPDATA%\Packages\Microsoft.WindowsTerminal_8wekyb3d8bbwe\LocalState.
GUID Advice
Before customising or getting inspiration from someone’s profile, it’s important you generate your own profile guids so it’s unique to you for the profile list.
You can also refence the GUID in the defaultProfile setting at the top of the file too.
You can generate GUIDs easily via the terminal itself - remember the days when you used GuidGen?
Otherwise, there’s always GuidGenerator. It’s all GUID!
Themes or Schemas
You can go crazy trying to find that perfect colour scheme for your terminal (or individual terminals too!) and your one stop shop these days should be AtomCorp’s Theme Factory or the Official Theme Park. Click ‘Get Theme’ which copies it to your clipboard and conveniently paste it into your settings.json file under the schemas section:
defaults section of the profile.In the same defaults section you can configure your font sizing and faces too. Which is covered in the next subsection.
If you want a specific shell or terminal to use a special schema, set that within it’s profile - Ubuntu gets Hybrid, PowerShell gets Pandora:
Pixel Perfect Fonts
You want the text you read on your terminal sessions to be crisp and clear, plus with GPU accelerated text rendering, we want all that lovely hinting!
There are two awesome fonts to consider, Cascadia-Code and Nerds Font. It takes popular fonts and adds a host of merged glyphs to provide crisp detail and great visualisations (the above screenshot uses Nerd Fonts for my PowerShell terminals).
The easiest guide to follow to setup fonts would be Adam Cooper’s Automating the patching of Cascadia Code to include Nerd Fonts. His Github Repo already contains the patched fonts to make life so much easier too.
Set the fonts per profile default:
Or as I do individually:
Yes I mix my fonts and my colours, but you don’t have to!
Install Powershell Core
PowerShell Core is the multi-platform version of Powershell (finally!), you’ll probably want to make it your primary terminal.
The additional argument installs Explorer context menu so you can right-click and open in the folder you’re in. Others are documented in the choco package.
Taken from the PowerShell installation docs.
Taken from the PowerShell installation docs.
Setup Oh-My-Posh
If you want that delicious PowerShell prompt (akin to OhMyZsh if you’ve been using that on your Mac) you need oh-my-posh.
This provides extra information based on your current folder (git status being the most common).
Installation is quite trivial these days and it’s well documented on the oh-my-posh repo. Some of the glyph’s may not render correctly (visible from the old Powershell prompt as below).

Windows Terminal, it’s fine if you use the Delugia Nerd font:
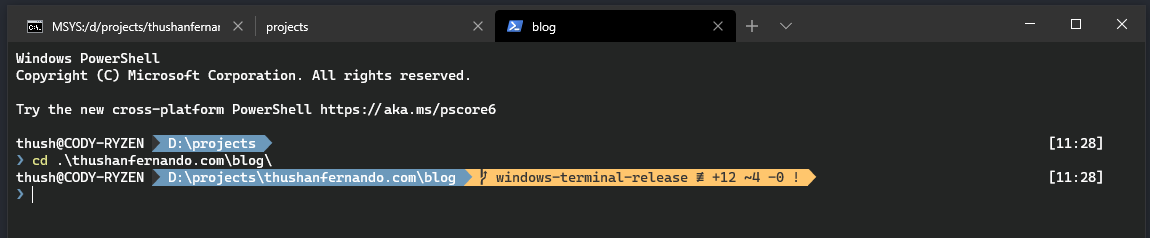
You’ll be the poshest /dev on the block now!
Windows Terminal Hacks
A collection of hacks and interesting things you can do with Windows Terminal.
Elevate PowerShell Easily
This is probably the most (currently) annoying thing with Windows Terminal and that’s the inability to natively invoke an elevated process natively. We work around this with using gsudo - an open-source sudo for Windows you can find in chocolatey.
Then add to the profile you want to elevate - I’ve chosen a new elevated PowerShell for my choco goodness.
The UAC prompt will appear as normal and the tabbed process will be elevated!
NOTE: This is a workaround until the official Windows Terminal supports it.
Setup Most Used SSH Sessions / Terminals / Shells
The great thing about ConEmu and now Windows Terminal is that you can add your custom SSH endpoints easily. If you SSH into several boxes regularly, set those up as terminals themselves in your list.
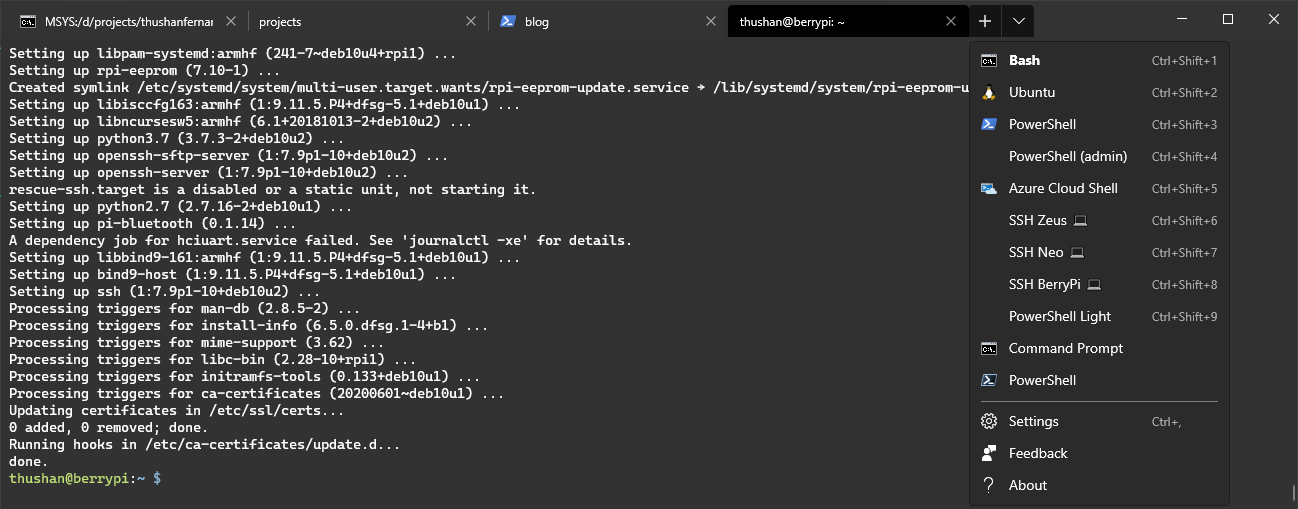
Here I’ve got my FreeBSD and Linux box as specific profiles that can be activated via some shortcuts too.
It’s a good idea to add the closeOnExit setting so the tab closes when the SSH session ends.
Python Shell in Windows Terminal
If you use Python a lot, you can go straight to a python shell.
I’ve installed Python 3.8 (32bit) and it resides in the path below. As I still maintain some Python 2.7.x things, I have both profiles in my Windows Terminal profile.
AWS Shell in Windows Terminal
If you thought having SSH endpoints was cool, you can even do that for your AWS Shell.
Make sure that Python3 is installed and that pip is available (included in v3.4+).
First install the aws-shell with pip (or follow their recommended approach):
Then add a new profile:
Configure start-up panes
You can create your perfect startup layout too via the command line with some nifty tricks.
For a new tab use new-tab with the profile specified with a -p. For example wt.exe ; new-tab -p "Bash" will by default open a new bash shell.
To split the pane, use the split-pane with the profile specified with a -p and whether to split Vertically -V or Horizontally -H. For example to split an instance of Ubuntu horizontally split-pane -p "Ubuntu" -H;. With this you can create a sequential splitting on panes to get the ideal layout you want. At this stage it’s only customisable to equal splitting of panes (which reduces it’s command line arg complexity too). There’s more options in the documentation.
The command line for the initial screenshot I have is:
You can opt to resize the panes with ALT SHIFT arrow-key as appropriate. You can close a pane with CTRL SHIFT W .
Windows Terminal Shortcuts
Command Palette for Windows Terminal
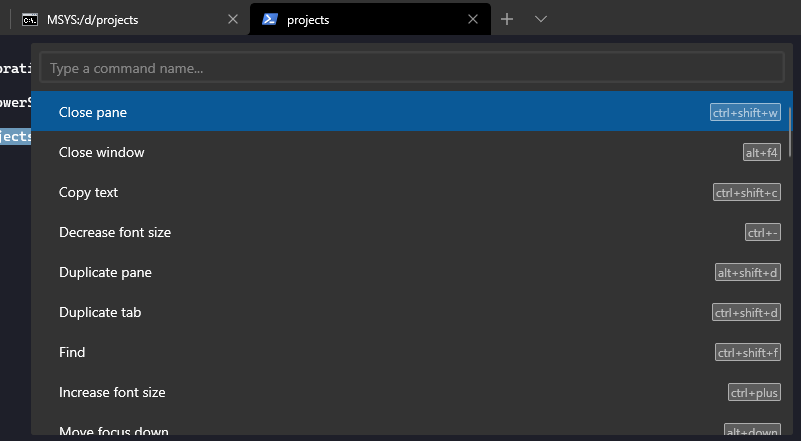
Yep, just like VSCode you can enable the Command Palette for Windows Terminal by using the commandPalette command.
Search for tabs
New in v1.2+ is the ability to search for a tab, this is probably my most used feature from the previews and if you have lots of tabs open, it’s a godsend.
To activate it, use the tabSearch command.
My settings.json File
This is my Windows Terminal settings.json file for reference only, it contains some specific things to my environment but you can see more concrete examples of the topics discussed above. It’ll be updated as I tweak things.
| // latest version is now here: | |
| // https://github.com/thushan/dotfiles/blob/main/windows/windows-terminal/settings.json | |